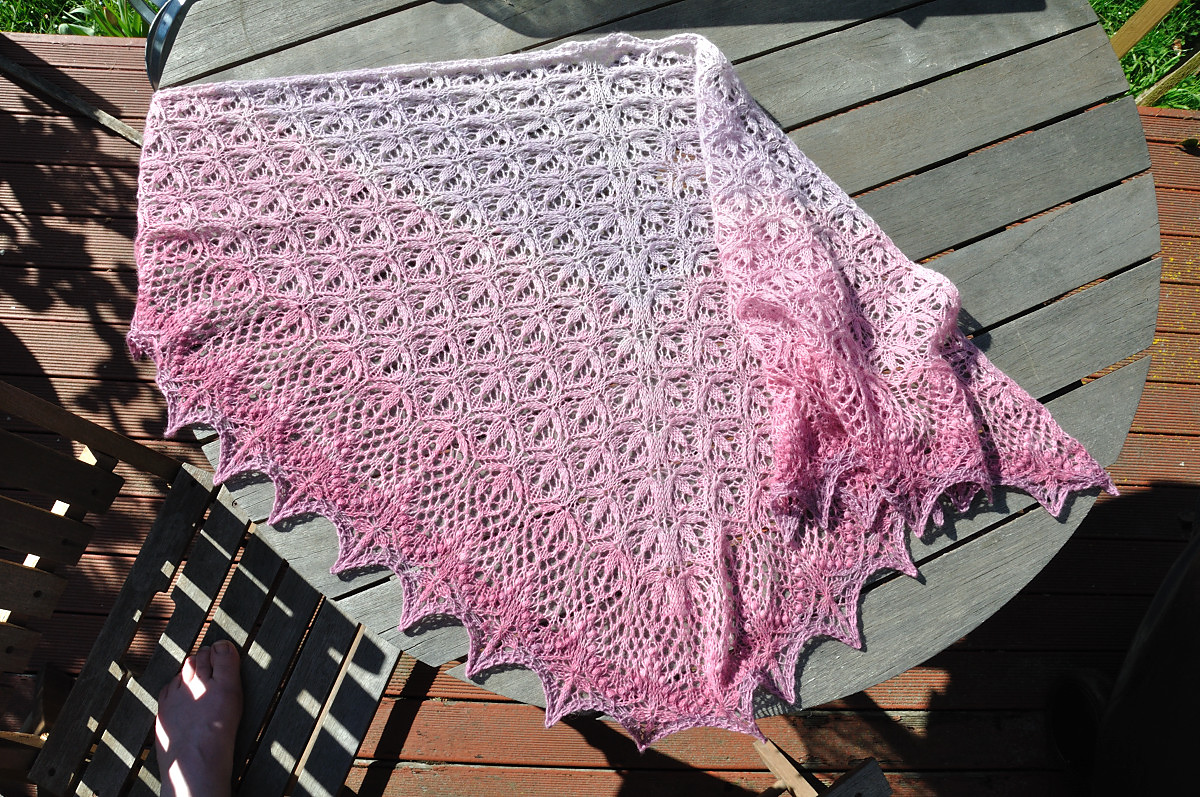
The towel is finally washed.
Still no word on when I can put the loom back together though. I'm managing to get some non-weaving stuff done though, so I guess that counts for something.
Starting to have plenty of ideas for what to weave when the loom is back together, I'm not yet sure which one is going to win.
Wednesday, 24 November 2010
Monday, 25 October 2010
And something on the weaving front
My weaving is finally done!
No finished photos yet, I haven't washed it or anything.
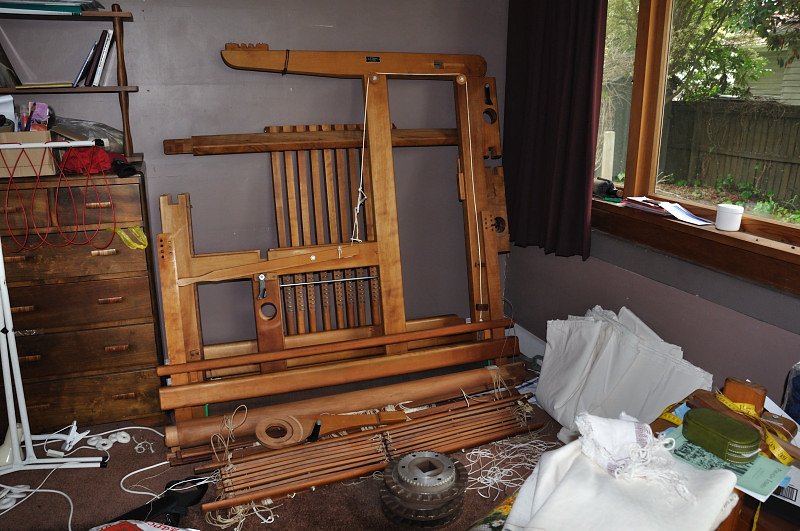
My loom is now in pieces leaning against the lounge wall:
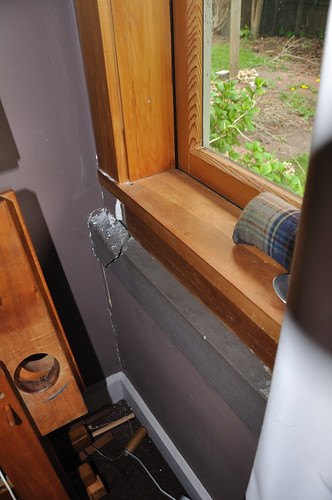
And the reason why:
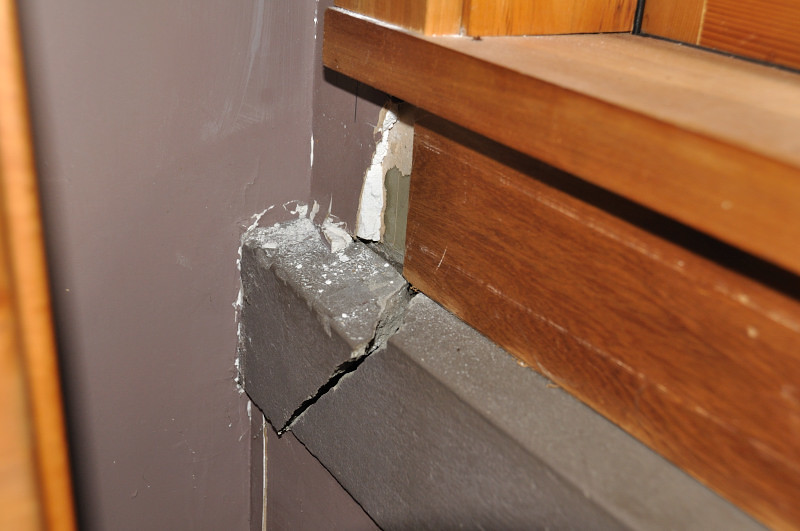
And a close-up:
My timing appears to be good though - the deconstruction happened yesterday, and today the EQC inspectors turned up. And now to wait for the next part of the process...
More dyeing photos
Friday, 1 October 2010
More dye!
Firstly, the shawl in the last post is finished
I had 0.8g of yarn left over(about 7m). I call that success.
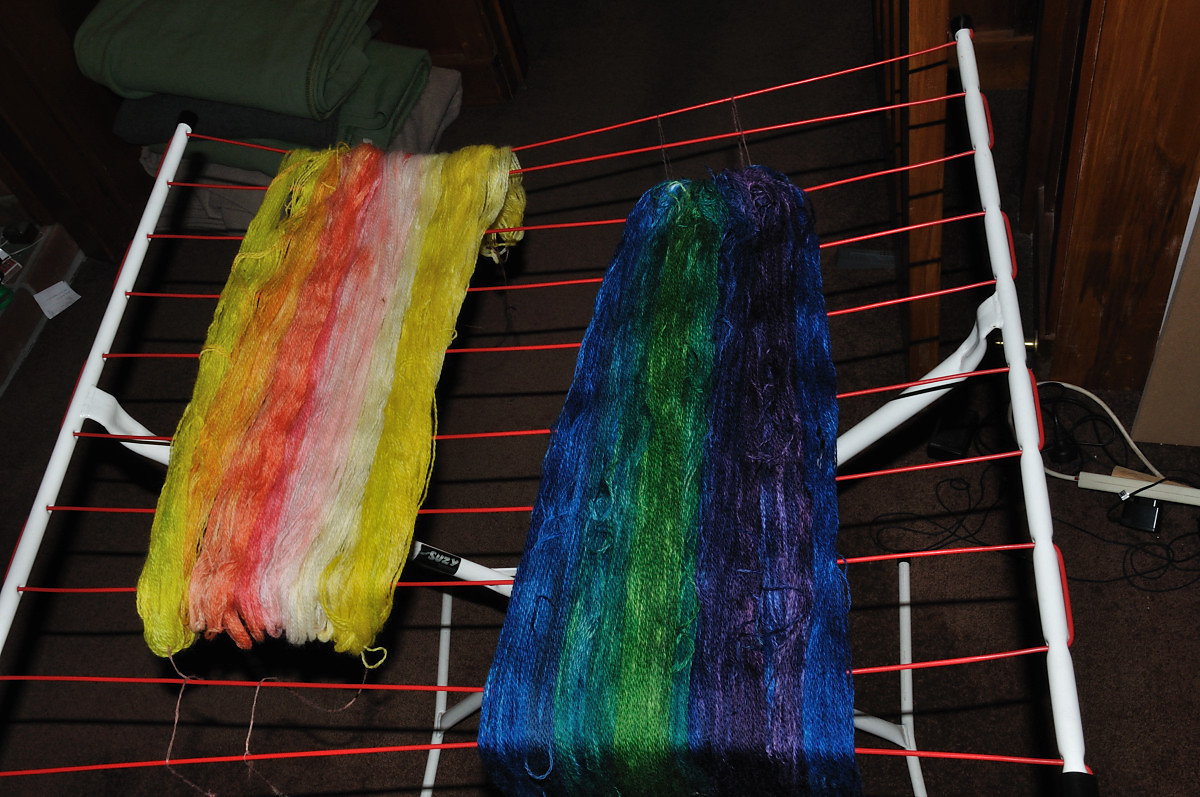
And on Tuesday some more dyeing happened.
I intend to get better photos when it has finished drying, and after reskeining. In theory there are three skeins in each of those colours, which may or may not make things Interesting.
I had 0.8g of yarn left over(about 7m). I call that success.
And on Tuesday some more dyeing happened.
I intend to get better photos when it has finished drying, and after reskeining. In theory there are three skeins in each of those colours, which may or may not make things Interesting.
Wednesday, 22 September 2010
Fun with dye
A while ago now I did some more dye experimenting.
The main target started out like this:
And turned into this:
(Pattern is Vernal Equinox (sorry, I could only find a Ravelry link) by Lankakomero)
The other part of the dye session was an experiment to try and create a gradient yarn. This was the result:
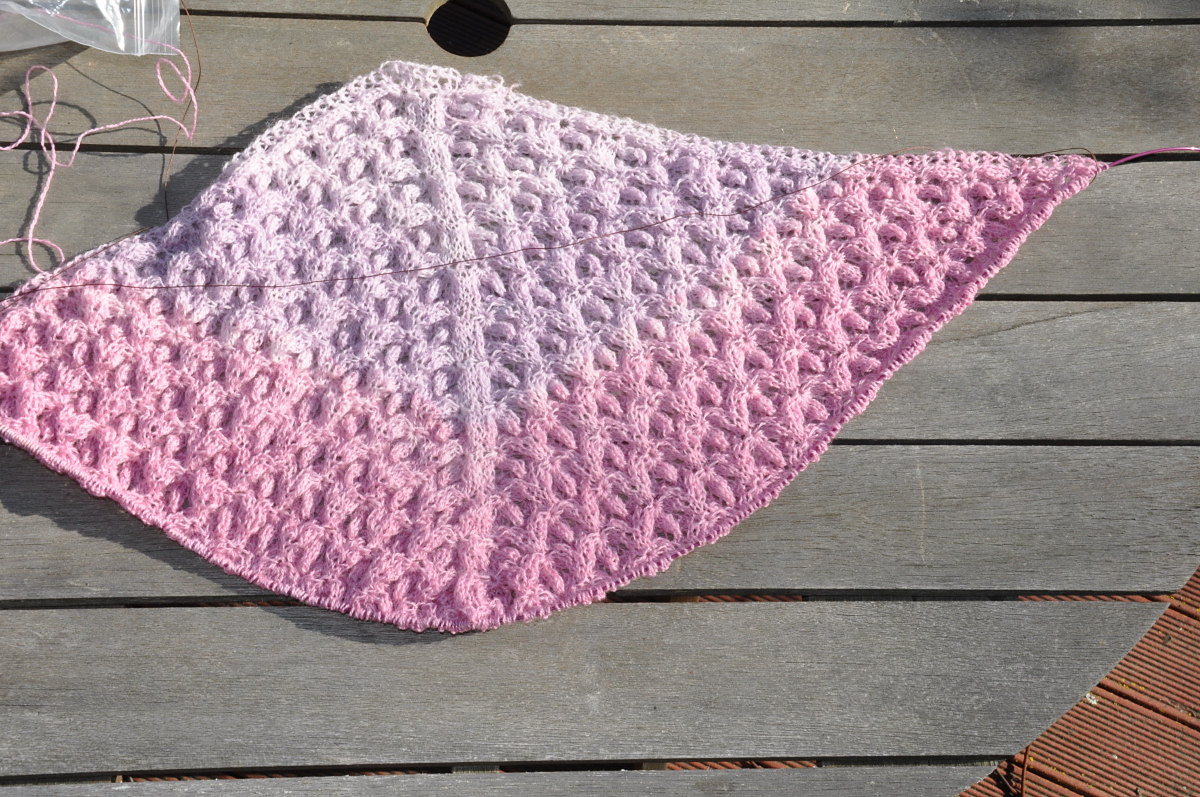
The reason I'm finally posting about it? I've started knitting it to test whether it actually works. Pattern is Echo Flower by Jenny Johnson Johnen.
I think I've done nearly as many repeats of the main pattern as I can get away with, and will be starting the border pattern soon.
I've decided the yarn colour is Magnolia:
And to show how it's coming out so far:
I was a little disappointed by the first couple of colour changes, and then I got up to the pink section. It seemed to be going on for a long time until I noticed that it had sneakily changed colour while I wasn't looking...
Monday, 6 September 2010
A bit of excitement
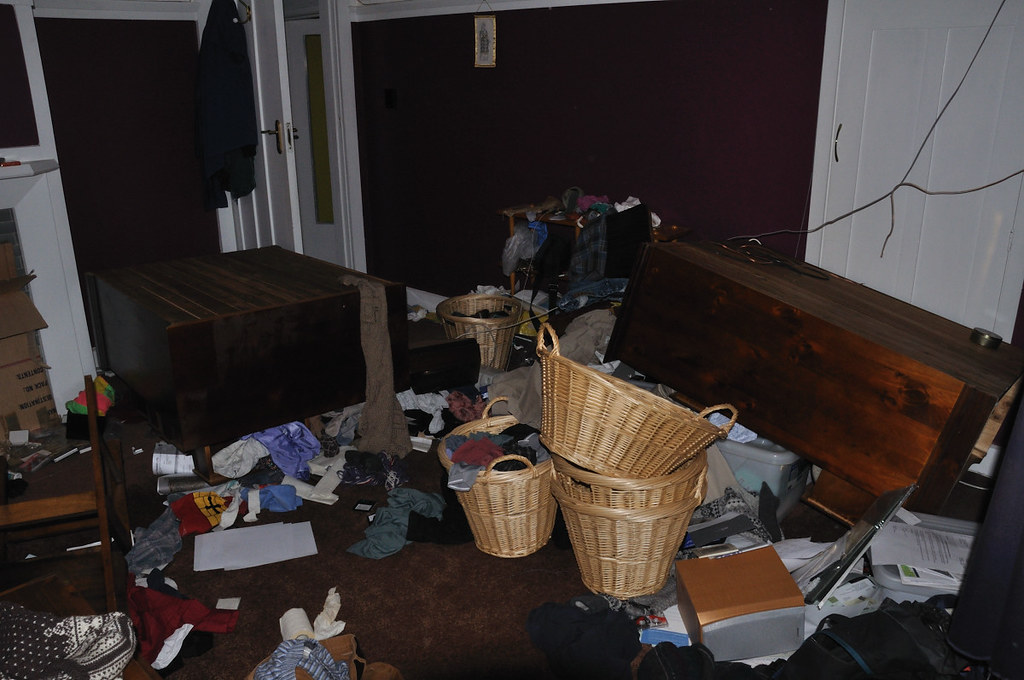
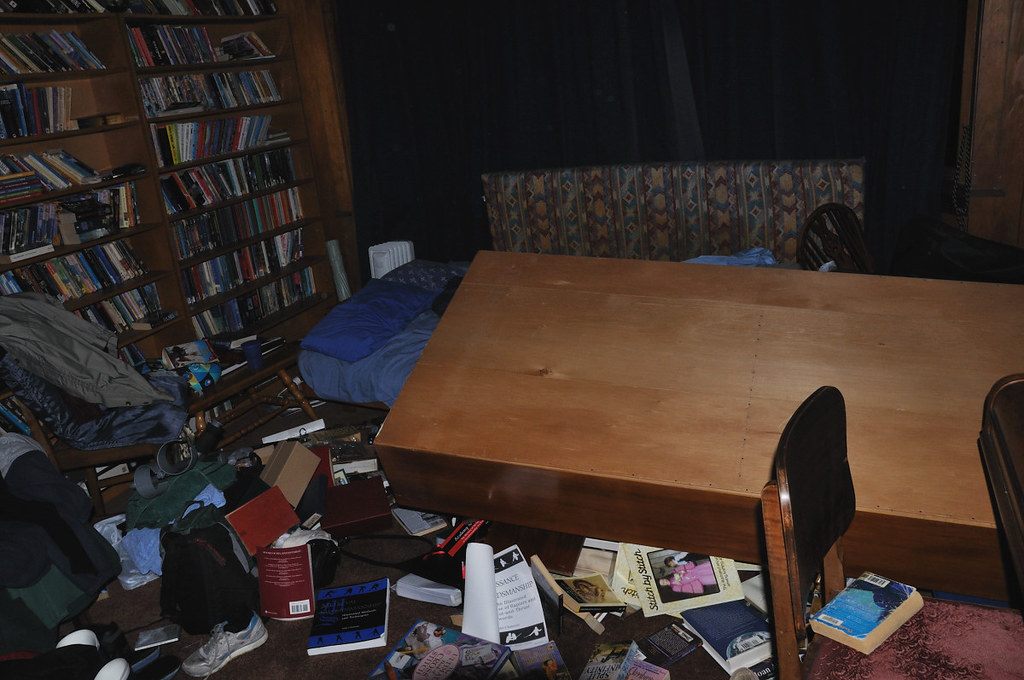
At 4.35 on Saturday morning we awoke to this:
Well, that's actually a lie. We awoke to darkness, and made a quick dash for the door. This is the aftermath - the chests of drawers fell after we reached the door. (Bedroom door is visible open at top left, the door on the right is the wardrobe).
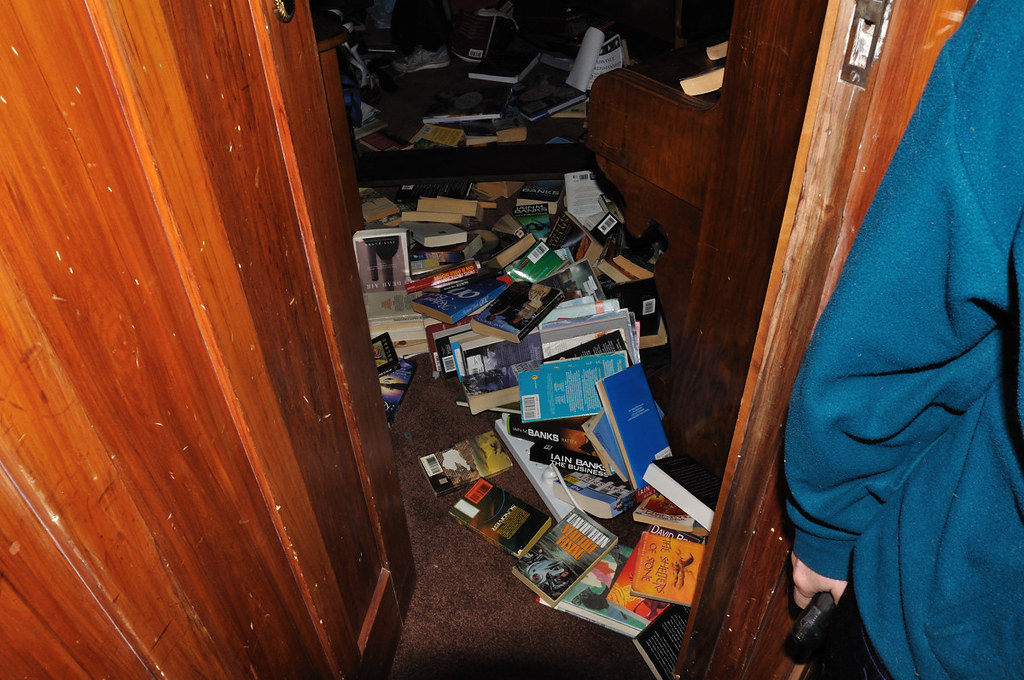
Somehow our emergency torch had managed to stay on top of the kitchen bookshelf. Next stop was into the library:
We had guests there that needed rescuing:
(Okay, we should have had the shelves screwed to the wall. We hadn't quite got that far...)
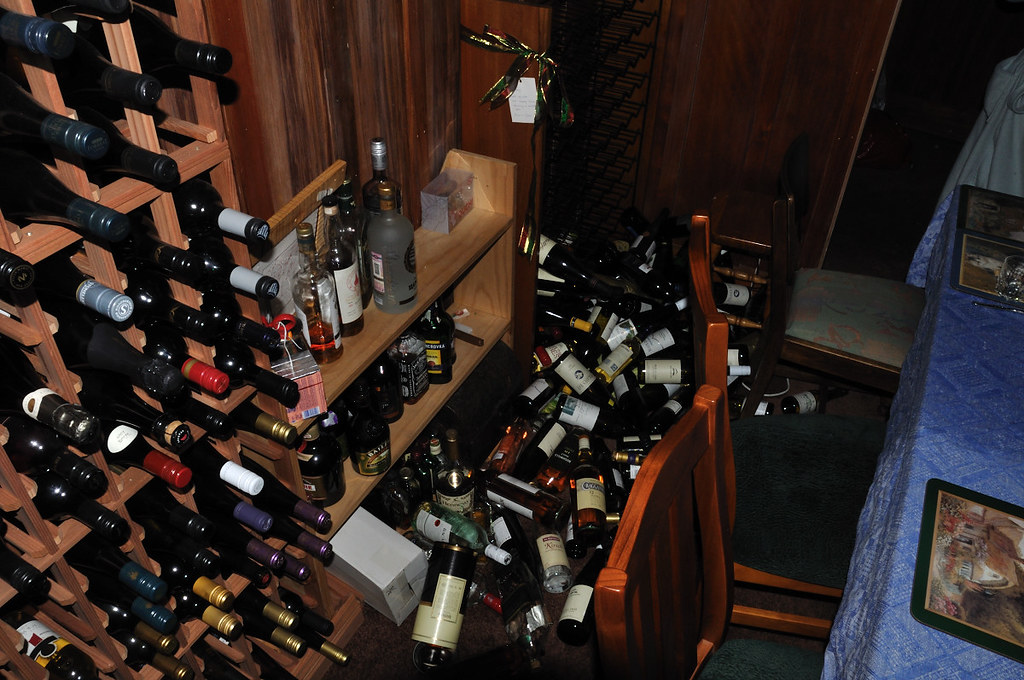
A brief investigation into the dining room showed that wooden wall-fixed wine racks seem to work much better than metal free-standing ones:
Impressively, there were only 3 broken wine bottles and one broken whisky bottle (nearly empty anyway). There was also a wine bottle with a cracked lid, which was only discovered later.
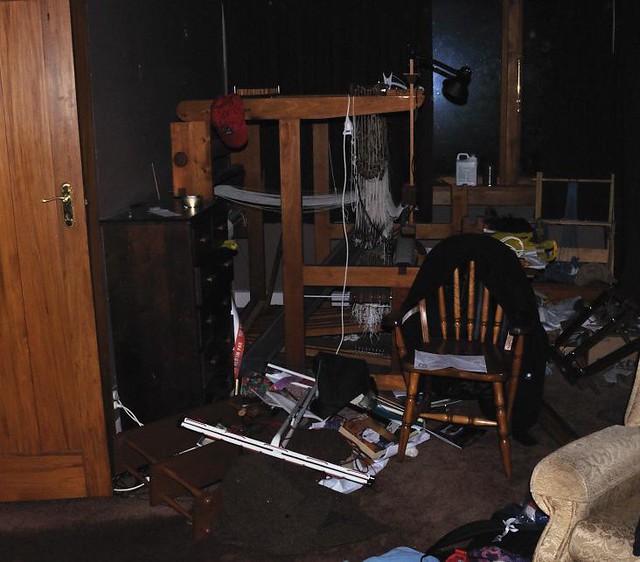
The loom appears to be perfectly fine. I'm not particularly surprised though - I think it would have taken something big falling on it to even have a chance of denting it.
We then had a while of sitting around listening to the radio. The reports started with some helpful observations like 'Possibly an earthquake, maybe somewhere in the South Island'. There were also people phoning in with descriptions, and I think the most accurate (although possibly not very helpful) was that it was like the Napier earthquake simulator at Te Papa...
As the sky started to get lighter we managed to listen in surprise to the continuing lack of fatalities. I had been a bit worried about my workplace - playing with molten metal is a fairly important part of it, and that didn't seem like a good thing to be doing at the time. (Apparently they ran through it, and were not very badly affected at all).
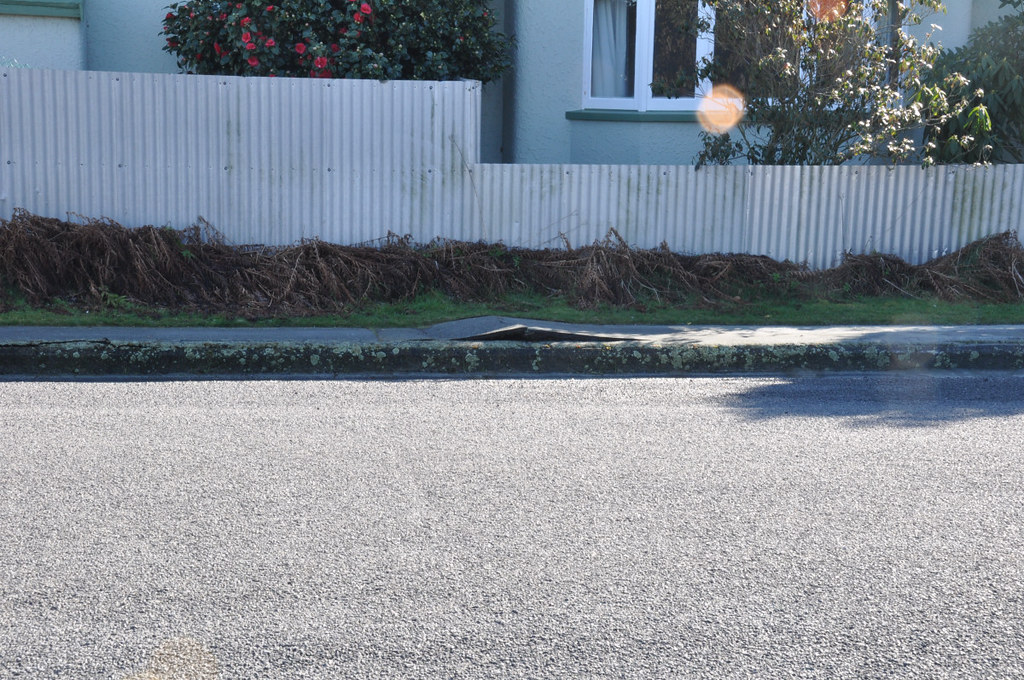
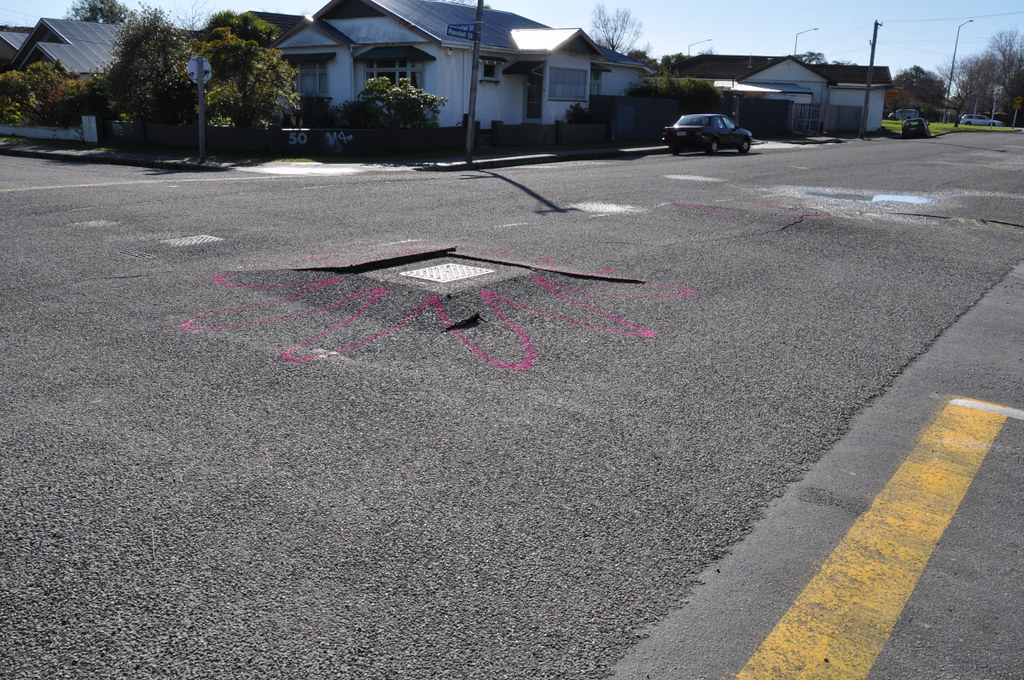
After it was light we went and had a look outside. A bit of minor house damage, a few cracked windows etc. The houses on our street seem to look okay too, although the street has developed some terrain:
There is a quite impressive slump in the road (no actual cracking) a block further on than these photos too.
In conclusion: Wooden buildings are fabulous. Our Civil Defence and local authorities have been doing a Very Good Job. I prefer not to wake up before dawn. It's important to have an accessible emergency torch. It's surprising how quickly you can come to ignore tremors of around magnitude 4-5. It's not surprising how quickly you can get sick of said tremors. The weaving will probably be delayed a bit longer.
If you want more actual detail, try here
Tuesday, 24 August 2010
Excessive photography...
Tea towel (unwashed)!
Shrinkage was negligible on the width - maybe a few mm, and 2cm over the length (65cm shrank to 63cm). I still need to hem, but I'll wait until I've finished the warp, then I'll use some of the loom waste as sewing thread.
And post-washing:
and the other side
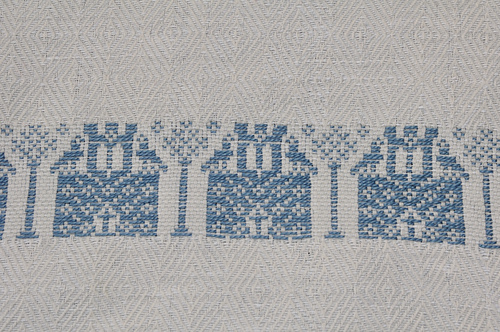
Close ups on the brocade sections:
Castles
Flowers
Unfortunately the blue cotton shrank a bit, making the edges draw in on the bands (I'd hoped it wouldn't, being an embroidery thread). It's not much shrinkage, but enough that I now know to be more careful on the next one.
The awful lines I was getting with my too-coarse reed have mostly gone (thanks to the tedious on-loom manipulation I was doing that took twice as long as the actual weaving). And as of today I have a new 16dpi reed. I'm half way through re-sleying, and I'm changing it to 64 epi (down from 70). That way, even if I do get lines they'll at least be regularly spaced in terms of the pattern.
Monday, 23 August 2010
Something off the loom
I finally finished up the tea towel that I've been working on for far too long. I then very cleverly failed to take photos.
Results:
I have a new tea towel. I also have a new reed on the way, and will be resleying at 64 epi when it arrives (was 70). I'm hoping that the 16 dpi reed will help a lot with the nightmares I was having with 8 or 9 ends per dent. And I've started charting up a new pattern for the decorative bands for the rest of the warp. I'm still deciding whether to make tea towels or one long runner/towel though.
I'm mostly happy with my edges, but the last brocade band I did pulled in a bit.
Sunday, 25 July 2010
Embroidery photos!
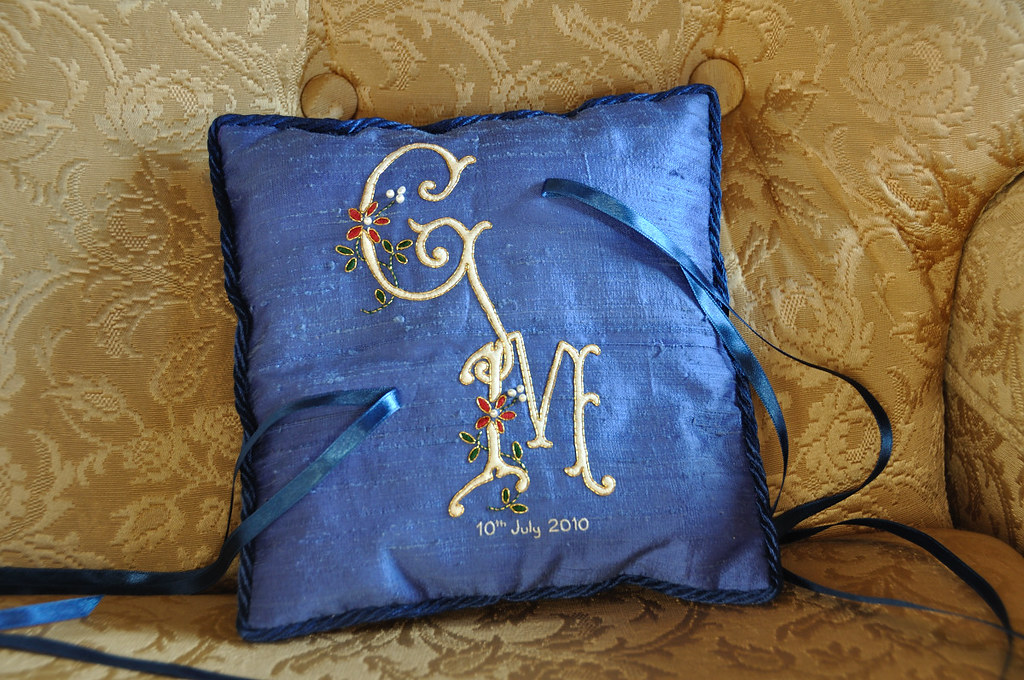
Well, it's taken me a while to get the photos of the finished cushion off the camera, but it's finally done. I finished the pillow on the Saturday morning at about 9.30, the wedding was midday. I had hoped to get it finished a bit earlier than that, but various unforeseen circumstances conspired against me.
The colours in this photo are not quite accurate - the ribbon and edging cord were a little closer in colour to the silk, but other than that the colours are pretty good.
I enjoyed making this pillow, although I was glad to take a break from satin stitch when I was done.
The colours in this photo are not quite accurate - the ribbon and edging cord were a little closer in colour to the silk, but other than that the colours are pretty good.
I enjoyed making this pillow, although I was glad to take a break from satin stitch when I was done.
Thursday, 1 July 2010
Embroidery progress
I'm definitely making progress now - I feel like I'm about a third of the way through the M. I'm having to be a bit careful of wear and tear on the thread, but I do feel like I'm getting better at this satin stitch thing. (I'm not feeling inclined to do any more any time soon though).
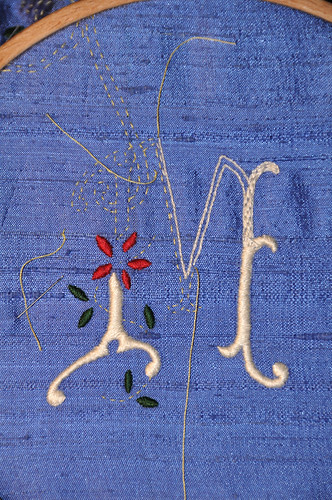
I did manage to remember to take a photo when I stopped stitching last night, so here it is:
The bottom half of both legs on the M are done, the top of the right leg is padded. About half of the rest is outlined - and in this photo you can actually see my yellow guide stitches, and the long tails where I'm pulling them out as I go. There is a little bit of unevenness on some of the edges, but I'm planning to outline everything with couched gold anyway.
I love the way the satin stitch looks, which I guess is probably the redeeming feature of the stitch. I'll try and get a daylight photo in the weekend (here's hoping for some not-too-gloomy weather).
Monday, 28 June 2010
Ring-pillow - started stitching
First step, and one that I find oddly satisfying - transferring the design to the fabric. If the fabric is pale I will sometimes just trace onto it using a pencil or water-disappearing pen (not sure what the proper name for those is). On dark fabric I will sometimes use a pale coloured pen (white, gold etc) - but I mostly use this (and pencil) for sewing and marking seams rather than embroidery where you run the risk of being able to see it on the finished product.
Tracing has the advantage of being fast, but it also has a chance of rubbing off before you finish the embroidery. My favourite reliable method of transferring embroidery is as follows:
Step One - trace the pattern onto tissue paper. (This is the first time I've used tissue - in the past I've just used lunch paper. The tissue paper is definitely easier to remove in the last step though).
Step Two - pin onto the fabric, ideally with it held taut. Tack along the lines with sewing cotton, using a colour you can see. On straight lines you can use long stitches, shorter on curves.
Step Three - when you're done tacking, tear the paper off. This is where tissue paper is great - I found that it tore along the stitch lines much more easily than the heavier lunch paper.
Here's a photo showing halfway through removing the paper. It's a little hard to see the stitching (yellow on blue), but that's mostly because it's winter and the lighting is terrible. (Maybe I'll try this again in summer...)
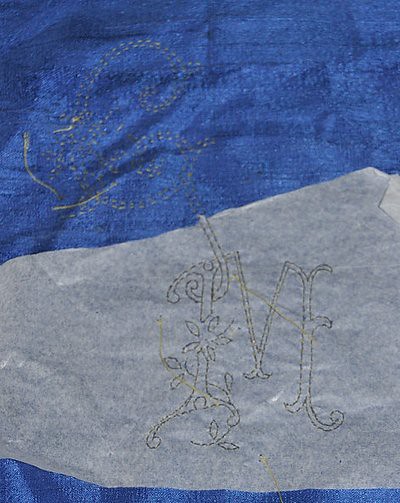
After removing the paper you're ready to stitch. I'm picking the tacking stitches out as I go, but this will depend what sort of stitches you're doing. Because this is fine, I didn't want to be trying to pick out stitches that I couldn't really see when I'd probably stitched through the thread a zillion times.
The petals and leaves are done in satin stitch. First step is outlining in split stitch, then filling the middle with some longitudinal stitches, then the final pass of satin stitching.
This photo shows the three stages:
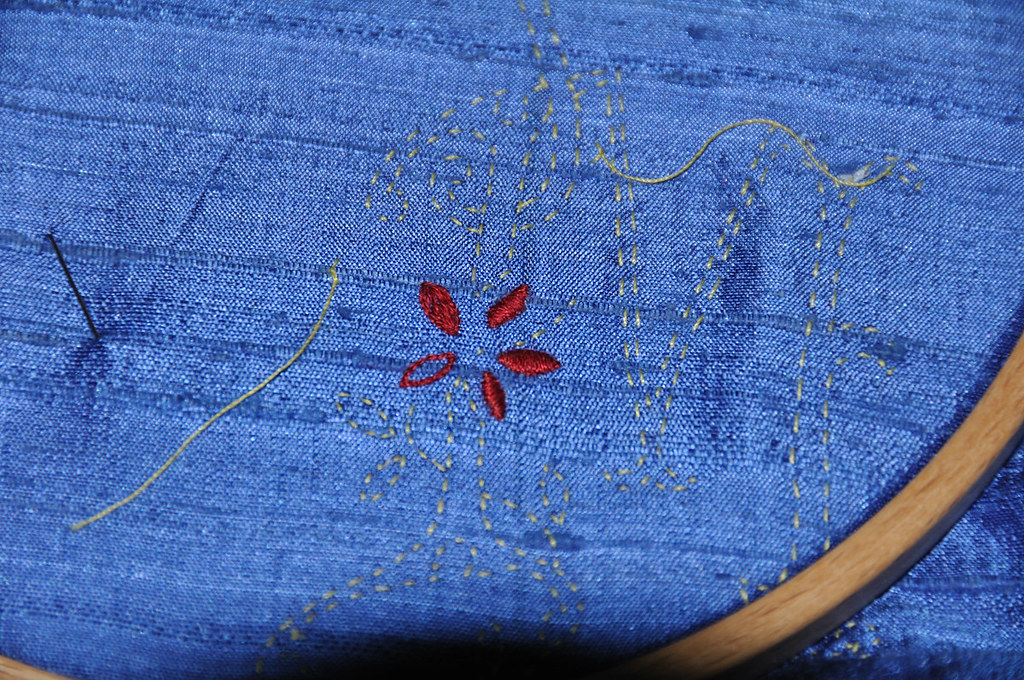
The three petals on the right are complete. The top left is outlined and filled, ready for the satin stitch, and the bottom left is just outlined.
I found that with the red I could do the satin stitch on 3 petals before the thread started looking a bit fuzzy, but I could only do 2 leaves with the green. I'm not sure if this is related to the dye, the age of the thread (both unknown), or something else.
At this point I have done both flowers, and the 6 leaves on the G. Still 5 leaves on the M left to go.
I intend to do the split stitch on the letters next, then see how I'm going for time. If I've got plenty of time then I'll satin stitch the letters too (and outline in gold), otherwise I'll leave them as a split stitch outline. The centre of the flowers, and the buds will be small pearls, and for the stems I intend to use gold thread couched with green.
Ring-pillow design details
Over the weekend I got a pattern drawn up and transferred to the fabric.
The fabric is a medium blue dupion silk, which I've backed with calico. After messing around with colours a bit, I decided I had to options. One option was to make all the embroidery pale, which would look very pretty and delicate. The other option was to use the bold colours I had originally thought, and outline everything with metallic gold. I thought this was probably the better option for the recipient (the wedding dress is red, so the flowers match).
This meant that I chose to go with a cream for the letters, rather than gold - I didn't want to use both a yellow and a metallic gold, and I don't think my goldwork skills would be up to the delicacy of the letters.
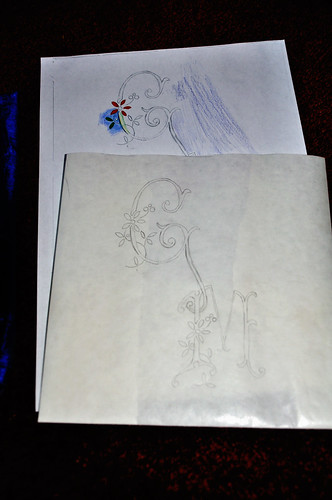
Here is the pattern - both the original tracing, and the photocopy that I played around with colouring in.
I'm using DMC stranded cotton, mostly because of convenience. I only have two weeks, and I didn't want to lose time to waiting for silks I had ordered to arrive. (I may have been able to find the right colours locally, but I didn't want to rely on it).
I'm fairly sure the gold thread I have is Kreinik japan thread, but I've had it sitting around on an old sewing thread spool for a while so I can't be sure.
Friday, 25 June 2010
And the embroidery makes an entrance
Okay, sometimes I do things that aren't weaving. I think this is the point at which I decide to give in and post a few of them, if I deem them to be worthy. (Also, if I'm doing something that means I'm not weaving, then I should still try to post occasionally).
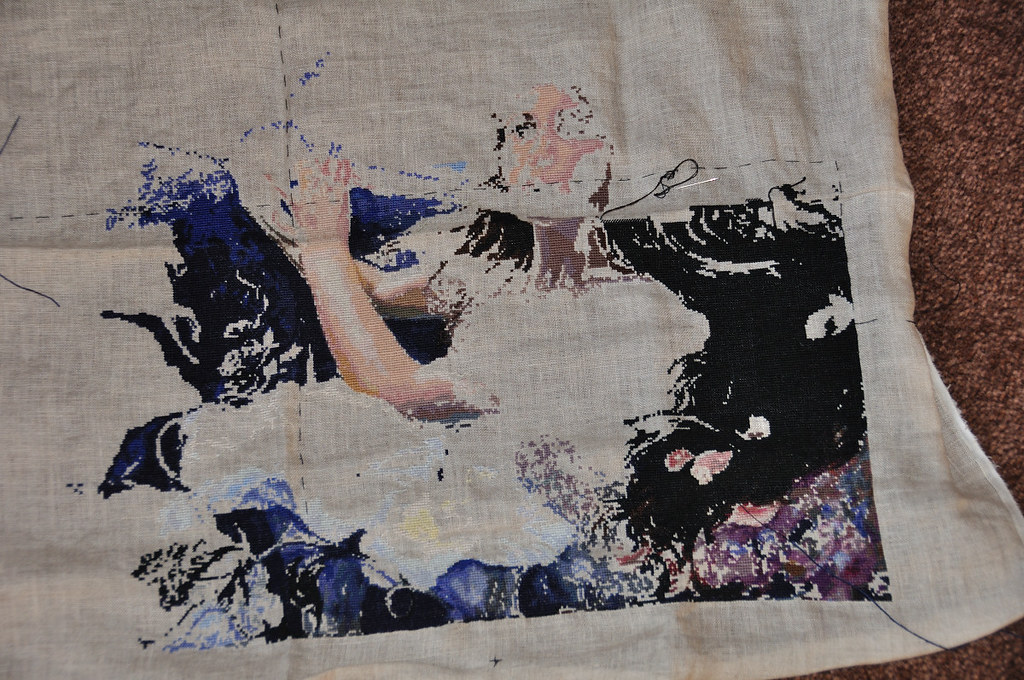
I have a giant cross-stitch under way that I expect to take approximately forever. It doesn't actually eat weaving time, because I only work on it in my breaks at work. I started about 8 months ago, and I think I might be nearly 1/8th done.
The dotted lines mark the centre - as you can see there's still quite a lot left to do.
More importantly though, I've been asked to make a wedding ring cushion for a friend who is getting married in 2 weeks. I have been given some fabric, ribbon and thread, which I can use or not as I see fit. Beyond that, the specification is that it should be about 20cm square, it should have nice long ribbons on it, and it can have a 'G' and 'M' if I feel like it.
This is the drawing, fabric and thread I was given.
Because I've only got two weeks for this project from start to delivery, I need to try not to make it to complicated. There are some nice monogram patterns on Needle 'n Thread (M here and G here). I'll probably use these letters, although the G could do with some modification to make it look less like a C. I think the letters will be in gold, the leaves and vines in green, and the flowers red with a pearl in the middle.
At this point, though, everything could change. I'll see how I feel about it when I've drawn out a few designs, and played with colours (and then had another look in daylight).
I have a giant cross-stitch under way that I expect to take approximately forever. It doesn't actually eat weaving time, because I only work on it in my breaks at work. I started about 8 months ago, and I think I might be nearly 1/8th done.
The dotted lines mark the centre - as you can see there's still quite a lot left to do.
More importantly though, I've been asked to make a wedding ring cushion for a friend who is getting married in 2 weeks. I have been given some fabric, ribbon and thread, which I can use or not as I see fit. Beyond that, the specification is that it should be about 20cm square, it should have nice long ribbons on it, and it can have a 'G' and 'M' if I feel like it.
This is the drawing, fabric and thread I was given.
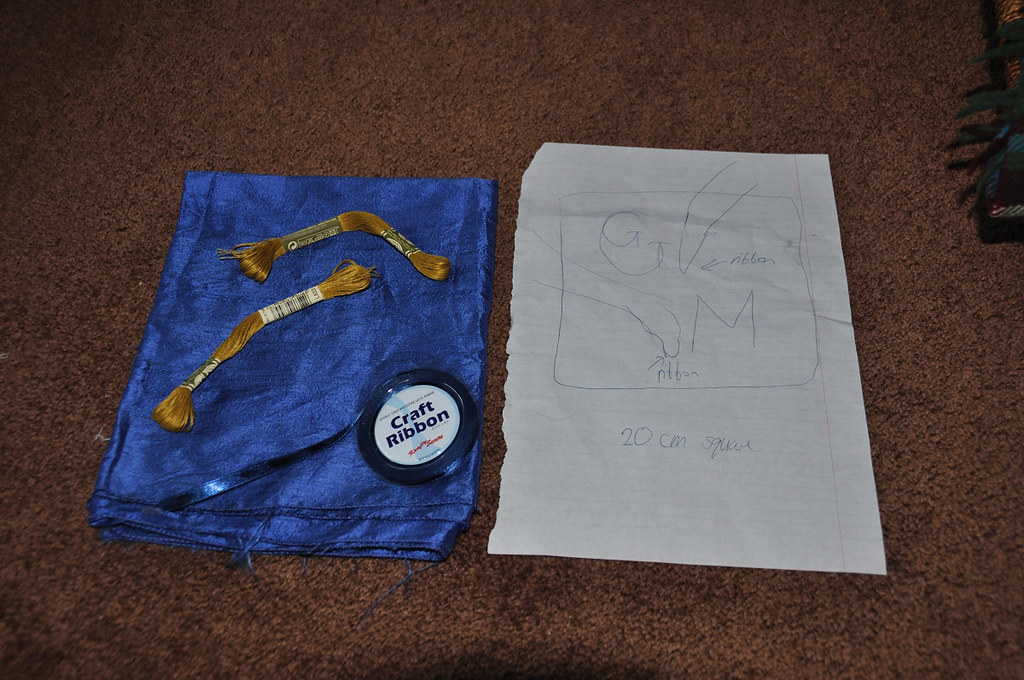
Because I've only got two weeks for this project from start to delivery, I need to try not to make it to complicated. There are some nice monogram patterns on Needle 'n Thread (M here and G here). I'll probably use these letters, although the G could do with some modification to make it look less like a C. I think the letters will be in gold, the leaves and vines in green, and the flowers red with a pearl in the middle.
At this point, though, everything could change. I'll see how I feel about it when I've drawn out a few designs, and played with colours (and then had another look in daylight).
And more progress - with photos
I have weaving, but it's been a bit of a battle. I was pleasantly surprised to find that 70 epi wasn't completely and utterly wrong. I was less pleasantly surprised to find that I should, in fact, be using a reed finer than 8 dpi.
(Okay, there wasn't much surprise there. I've only got the one though - next thing on the loom-mod list will be getting a new one. It'll probably by 16 dpi, since that's the finest I've managed to find anywhere in this country, and I really don't want to know what overseas shipping would be on a 48" reed...)
It appears that sleying with 8 or 9 ends in each dent is suboptimal, and gives this effect:
See those stripes on the right? Yeah. Luckily I have found a way to redeem this (I can't imagine it would work on less sturdy threads though). It's very tedious and takes about twice as long as the actual weaving. What I have to do is take a pin, and stroke along the diagonals to move the threads to where they should be sitting.
So I spend about 45 minutes weaving 3 diamonds, and then the next hour and a half realigning all the warp threads. I'm nearly at the end of the first tea towel now, and I fully intend to get a new reed for the rest of the warp. (And while I'm about it I think I'll change to 64 epi - the diamonds could be quite happily be a little shorter. Also, making the towels wider can't possibly be a bad thing).
And because I actually managed to remember to take a photo before it disappeared underneath the loom entirely, here's the decorative bands:
They're entirely manual. (Also tedious, but at least I feel like I'm achieving something with this)
I think the positive outweighs the negative in this project. The negative is all the tedious things I've already mentioned. The positive is that I've discovered that I can work with fine threads, that I've set up the electric drill for winding bobbins, and that I love the way the sample feels - it has all the soft crispness that I love in linen. I think the finished cloth will be very good for drying dishes. Next project is probably something less fine though...
Saturday, 12 June 2010
Slow, but it is progress
Right. Threading is now all done, and I have a sample. (I wasn't sure I was going to do one, but I spotted a threading mistake after weaving about 3 inches).
There was a bit of a delay on the threading - I managed to get a bumblebee sting on my arm, which meant I couldn't do any threading for about a week. (It's a very silly story, but no sillier than things that happened to other people I know at around the same time. I think there was just something strange in the air that week...)
And now that I've worked out what I'm doing, and that it looks like it should work it might be time for some details.
The warp is 40/2 combed cotton, and the weft is a linen single (25 lea, from memory). It's a 6 shaft twill, and the sett is 70 epi. I wasn't sure if I was going mad with that calculation, but it appears to work. The sample has a nice soft-but-crisp feel. I think this is possibly the point where I should mention that I love the feel of linen...
Saturday, 15 May 2010
The threading begins
Started threading heddles now. I suspect this will take a while. (About 60 heddles threaded so far, was interrupted to eat cake).
Will post again when I'm done. I'm still vaguely optimistic about getting everything set up by the 26th (next meeting).
Cake eaten, time to go back to threading!
Will post again when I'm done. I'm still vaguely optimistic about getting everything set up by the 26th (next meeting).
Cake eaten, time to go back to threading!
Sunday, 9 May 2010
Progress
Warp wound on now. Next marathon will be threading. I suspect I should set up all the right numbers of heddles before I start, to try and avoid at least one headache when I start.
Time to go and calculate heddle numbers!
Tuesday, 4 May 2010
Warp is all wound now. It may be too fine for me to weave competently, I hope not. I guess getting it threaded up by the next weaving meeting will count for something...
And in other news, my arms are tired. The cotton feels lovely running through my hands though.
And now I just need to clear out the stuff that's managed to get stashed inside my loom. Maybe tomorrow.
And in other news, my arms are tired. The cotton feels lovely running through my hands though.
And now I just need to clear out the stuff that's managed to get stashed inside my loom. Maybe tomorrow.
Sunday, 2 May 2010
Plotting
Started calculating out the tea towels. I think I may possibly be a little mad, and I'm currently trying to work out how long a warp I want to make. I'm somewhat limited by the length I can wind on my inkle loom (one day I'll either make/buy a warping board/mill, or possibly just make some more inkle loom pegs).
I haven't worked out my maximum length yet, and I don't know how long I want to be stuck on a fine cotton warp for. I suspect I'll do it as long as I can.
(Just had a play, the maximum length I can work out at the moment is about 3.8m. I guess that'll do.)
I haven't worked out my maximum length yet, and I don't know how long I want to be stuck on a fine cotton warp for. I suspect I'll do it as long as I can.
(Just had a play, the maximum length I can work out at the moment is about 3.8m. I guess that'll do.)
Tuesday, 27 April 2010
And back to reality
Just got a weaving meeting reminder today, apparently it's tomorrow and not last week like I had thought. Oops?
I guess I should start thinking about tea towels, since they seem to be my destiny.
Wednesday, 24 February 2010
Some Clarification
Just to clarify my previous post. I didn't make everything in that photo. I didn't make the beaded lace, I'm just sewing it on.
I did do the lace shawl: (Pattern is Crown Prince shawl, from Knitted Lace of Estonia by Nancy Bush. I am in love.)
I tried sizing this to fit, but it didn't shrink well. Not well at all.
And the embroidery: (Pattern is from Needle 'N Thread - a great embroidery blog)
There's a weaving link here - the embroidery is sitting on my weaving stool/bench in this photo...
I also didn't make the chair that it's all draped over...
Monday, 22 February 2010
Excuses...
Monday, 4 January 2010
Next project
Looks like the next project might be some more tea towels. I was planning to make something bigger, but I'm going to need to make more heddles for that. Thus, I will do the sampler version first (which is probably a smart plan anyway).
And with any luck the thrums will be adequate for making new heddles with...
Subscribe to:
Posts (Atom)