Monday 28 June 2010

Ring-pillow - started stitching

First step, and one that I find oddly satisfying - transferring the design to the fabric. If the fabric is pale I will sometimes just trace onto it using a pencil or water-disappearing pen (not sure what the proper name for those is). On dark fabric I will sometimes use a pale coloured pen (white, gold etc) - but I mostly use this (and pencil) for sewing and marking seams rather than embroidery where you run the risk of being able to see it on the finished product.

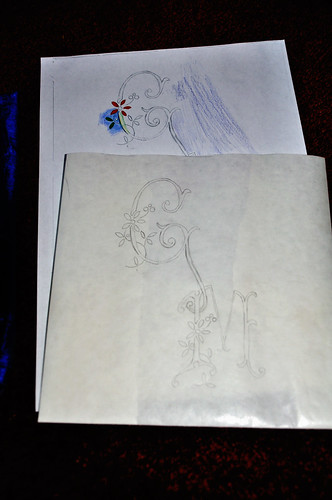
Tracing has the advantage of being fast, but it also has a chance of rubbing off before you finish the embroidery. My favourite reliable method of transferring embroidery is as follows:

Step One - trace the pattern onto tissue paper. (This is the first time I've used tissue - in the past I've just used lunch paper. The tissue paper is definitely easier to remove in the last step though).

Step Two - pin onto the fabric, ideally with it held taut. Tack along the lines with sewing cotton, using a colour you can see. On straight lines you can use long stitches, shorter on curves.

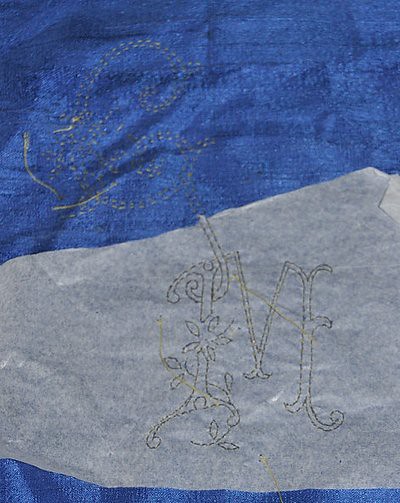
Step Three - when you're done tacking, tear the paper off. This is where tissue paper is great - I found that it tore along the stitch lines much more easily than the heavier lunch paper.

Here's a photo showing halfway through removing the paper. It's a little hard to see the stitching (yellow on blue), but that's mostly because it's winter and the lighting is terrible. (Maybe I'll try this again in summer...)
DSC_4853

After removing the paper you're ready to stitch. I'm picking the tacking stitches out as I go, but this will depend what sort of stitches you're doing. Because this is fine, I didn't want to be trying to pick out stitches that I couldn't really see when I'd probably stitched through the thread a zillion times.

The petals and leaves are done in satin stitch. First step is outlining in split stitch, then filling the middle with some longitudinal stitches, then the final pass of satin stitching.

This photo shows the three stages:
DSC_4855
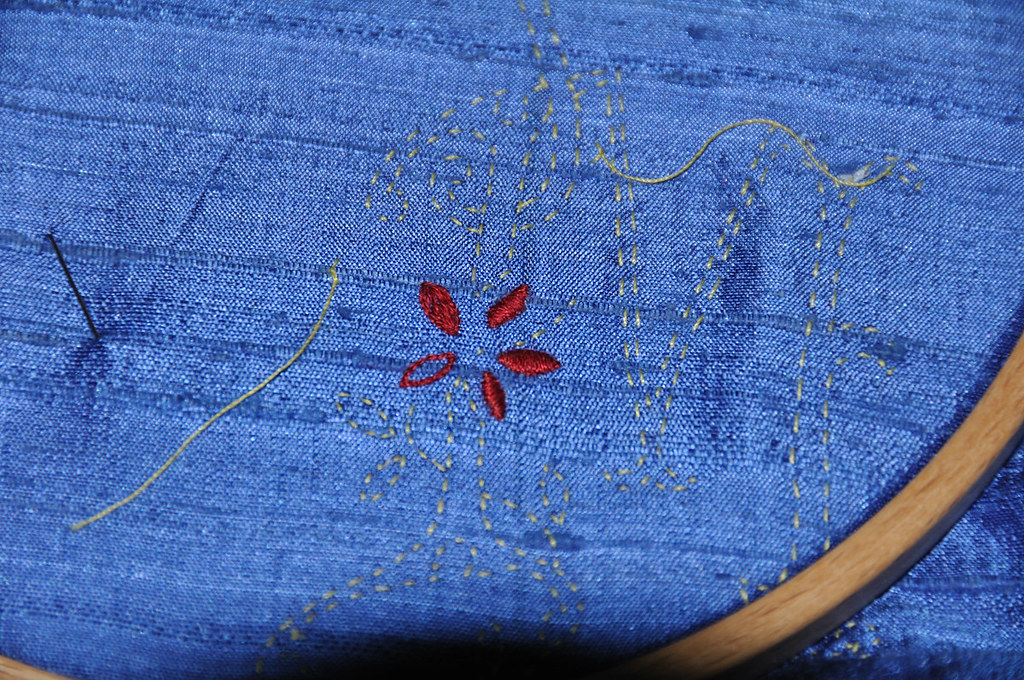
The three petals on the right are complete. The top left is outlined and filled, ready for the satin stitch, and the bottom left is just outlined.

I found that with the red I could do the satin stitch on 3 petals before the thread started looking a bit fuzzy, but I could only do 2 leaves with the green. I'm not sure if this is related to the dye, the age of the thread (both unknown), or something else.

At this point I have done both flowers, and the 6 leaves on the G. Still 5 leaves on the M left to go.

I intend to do the split stitch on the letters next, then see how I'm going for time. If I've got plenty of time then I'll satin stitch the letters too (and outline in gold), otherwise I'll leave them as a split stitch outline. The centre of the flowers, and the buds will be small pearls, and for the stems I intend to use gold thread couched with green.

Ring-pillow design details

Over the weekend I got a pattern drawn up and transferred to the fabric.

The fabric is a medium blue dupion silk, which I've backed with calico. After messing around with colours a bit, I decided I had to options. One option was to make all the embroidery pale, which would look very pretty and delicate. The other option was to use the bold colours I had originally thought, and outline everything with metallic gold. I thought this was probably the better option for the recipient (the wedding dress is red, so the flowers match).

This meant that I chose to go with a cream for the letters, rather than gold - I didn't want to use both a yellow and a metallic gold, and I don't think my goldwork skills would be up to the delicacy of the letters.

Here is the pattern - both the original tracing, and the photocopy that I played around with colouring in.
DSC_4851

I'm using DMC stranded cotton, mostly because of convenience. I only have two weeks, and I didn't want to lose time to waiting for silks I had ordered to arrive. (I may have been able to find the right colours locally, but I didn't want to rely on it).

I'm fairly sure the gold thread I have is Kreinik japan thread, but I've had it sitting around on an old sewing thread spool for a while so I can't be sure.

Friday 25 June 2010

And the embroidery makes an entrance

Okay, sometimes I do things that aren't weaving. I think this is the point at which I decide to give in and post a few of them, if I deem them to be worthy. (Also, if I'm doing something that means I'm not weaving, then I should still try to post occasionally).

I have a giant cross-stitch under way that I expect to take approximately forever. It doesn't actually eat weaving time, because I only work on it in my breaks at work. I started about 8 months ago, and I think I might be nearly 1/8th done.

DSC_4844
The dotted lines mark the centre - as you can see there's still quite a lot left to do.

More importantly though, I've been asked to make a wedding ring cushion for a friend who is getting married in 2 weeks. I have been given some fabric, ribbon and thread, which I can use or not as I see fit. Beyond that, the specification is that it should be about 20cm square, it should have nice long ribbons on it, and it can have a 'G' and 'M' if I feel like it.

DSC_4849
This is the drawing, fabric and thread I was given.

Because I've only got two weeks for this project from start to delivery, I need to try not to make it to complicated. There are some nice monogram patterns on Needle 'n Thread (M here and G here). I'll probably use these letters, although the G could do with some modification to make it look less like a C. I think the letters will be in gold, the leaves and vines in green, and the flowers red with a pearl in the middle.

At this point, though, everything could change. I'll see how I feel about it when I've drawn out a few designs, and played with colours (and then had another look in daylight).

And more progress - with photos

I have weaving, but it's been a bit of a battle. I was pleasantly surprised to find that 70 epi wasn't completely and utterly wrong. I was less pleasantly surprised to find that I should, in fact, be using a reed finer than 8 dpi.

(Okay, there wasn't much surprise there. I've only got the one though - next thing on the loom-mod list will be getting a new one. It'll probably by 16 dpi, since that's the finest I've managed to find anywhere in this country, and I really don't want to know what overseas shipping would be on a 48" reed...)

It appears that sleying with 8 or 9 ends in each dent is suboptimal, and gives this effect:

See those stripes on the right? Yeah. Luckily I have found a way to redeem this (I can't imagine it would work on less sturdy threads though). It's very tedious and takes about twice as long as the actual weaving. What I have to do is take a pin, and stroke along the diagonals to move the threads to where they should be sitting.

So I spend about 45 minutes weaving 3 diamonds, and then the next hour and a half realigning all the warp threads. I'm nearly at the end of the first tea towel now, and I fully intend to get a new reed for the rest of the warp. (And while I'm about it I think I'll change to 64 epi - the diamonds could be quite happily be a little shorter. Also, making the towels wider can't possibly be a bad thing).

And because I actually managed to remember to take a photo before it disappeared underneath the loom entirely, here's the decorative bands:

They're entirely manual. (Also tedious, but at least I feel like I'm achieving something with this)

I think the positive outweighs the negative in this project. The negative is all the tedious things I've already mentioned. The positive is that I've discovered that I can work with fine threads, that I've set up the electric drill for winding bobbins, and that I love the way the sample feels - it has all the soft crispness that I love in linen. I think the finished cloth will be very good for drying dishes. Next project is probably something less fine though...

Saturday 12 June 2010

Slow, but it is progress

Right. Threading is now all done, and I have a sample. (I wasn't sure I was going to do one, but I spotted a threading mistake after weaving about 3 inches).

There was a bit of a delay on the threading - I managed to get a bumblebee sting on my arm, which meant I couldn't do any threading for about a week. (It's a very silly story, but no sillier than things that happened to other people I know at around the same time. I think there was just something strange in the air that week...)

And now that I've worked out what I'm doing, and that it looks like it should work it might be time for some details.

The warp is 40/2 combed cotton, and the weft is a linen single (25 lea, from memory). It's a 6 shaft twill, and the sett is 70 epi. I wasn't sure if I was going mad with that calculation, but it appears to work. The sample has a nice soft-but-crisp feel. I think this is possibly the point where I should mention that I love the feel of linen...